One of the most frequent problems that Windows users encounter is the corruption of system files. This can lead to several issues, from sluggish performance to system failures.
Having the appropriate tools when trying to fix corrupted system files on Windows 11 might be beneficial. The same techniques can be used to repair corrupted system files in Windows 10 and 7.
Why do Windows system files get corrupted?
There are a variety of ways in which your system files can get corrupted:
- Malware or virus infections – Windows files can become corrupted by malicious software or viruses, causing system instability and data loss.
- Hardware malfunctions – Data corruption in Windows files can result in errors and crashes when faulty HDDs or RAM are used.
- Incomplete software installations or upgrades – This can cause application issues if software upgrades or installations are stopped.
- Power surges – Unexpected power surges or oscillations might harm the storage drive and other computer parts, potentially corrupting files.
- Improper shutdowns – The system operation and data integrity may be impacted by forcibly shutting down the computer.
These elements may alter or harm system files, causing problems including sluggish operation, crashes, or even boot failure.
Fortunately, Windows has some tools to help you fix these files and restore your system to working order. Let’s go over the capabilities and applications of these tools.
How can I repair corrupted system files?
Windows has a few practical built-in tools for fixing system files. Although these tools are effective, people with more experience in this field may find them challenging. This happens because in order to run the commands, you must utilize Command Prompt to access them.
1. Windows built-in tools
1.1. SFC (System File Checker)
SFC is a command-line tool that checks the accuracy of system files and fixes them as necessary. To use SFC, follow these steps:
- Press the Win+ X keys and choose Command Prompt (Admin) or Windows PowerShell (Admin) from the list.
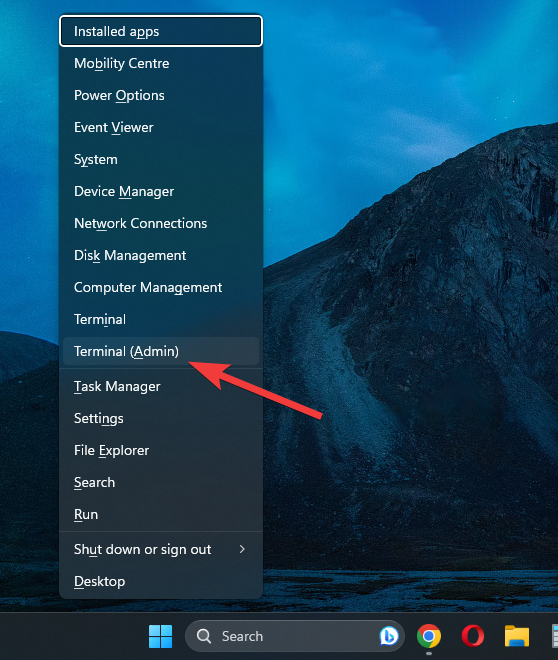
- Type the following command and press Enter to run it:
sfc /scannow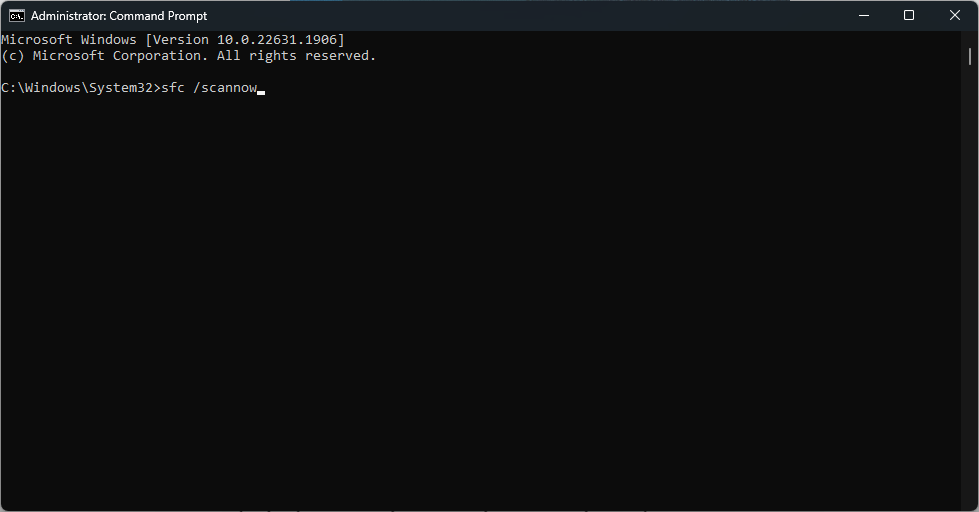
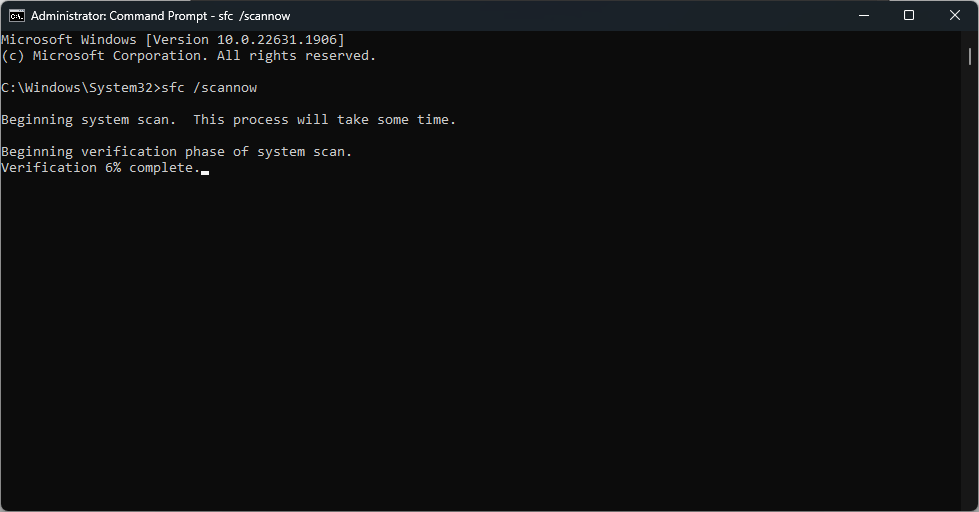
- Wait for the scan and repair process to complete.
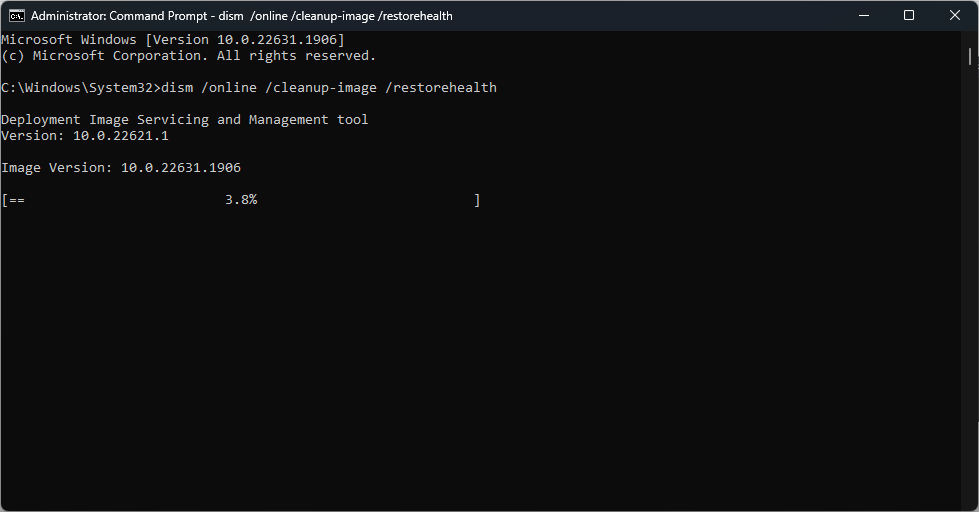
1.2. DISM (Deployment Image Servicing and Management)
Windows performs image repair through a command-line tool called DISM which may be used by following these steps:
- Press the Win+ X key combination and choose either Command Prompt (Admin) or Windows PowerShell (Admin) from the list.

- Type the following command and run it by pressing Enter:
dism /online /cleanup-image /restorehealth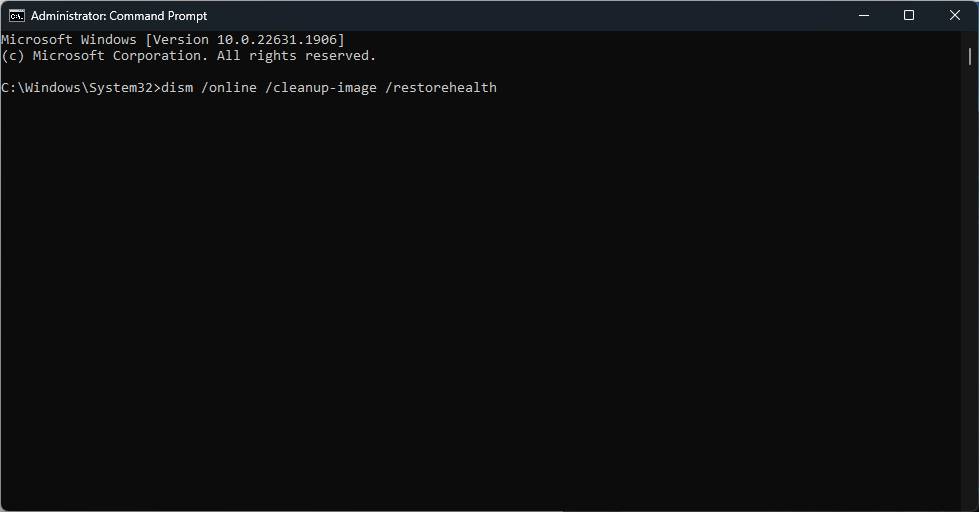
- The scan and repair process of the Windows image starts.
1.3. Startup Repair
This tool can fix problems that stop Windows from booting normally.
To access the Startup Repair menu, boot your computer from the Windows installation DVD. Then, choose Repair your computer from the options menu.
Tip: Use the Windows installation CD to access Startup Repair.
Follow these steps to create a Windows installation media:
- Visit Microsoft’s website and download the Media Creation Tool.
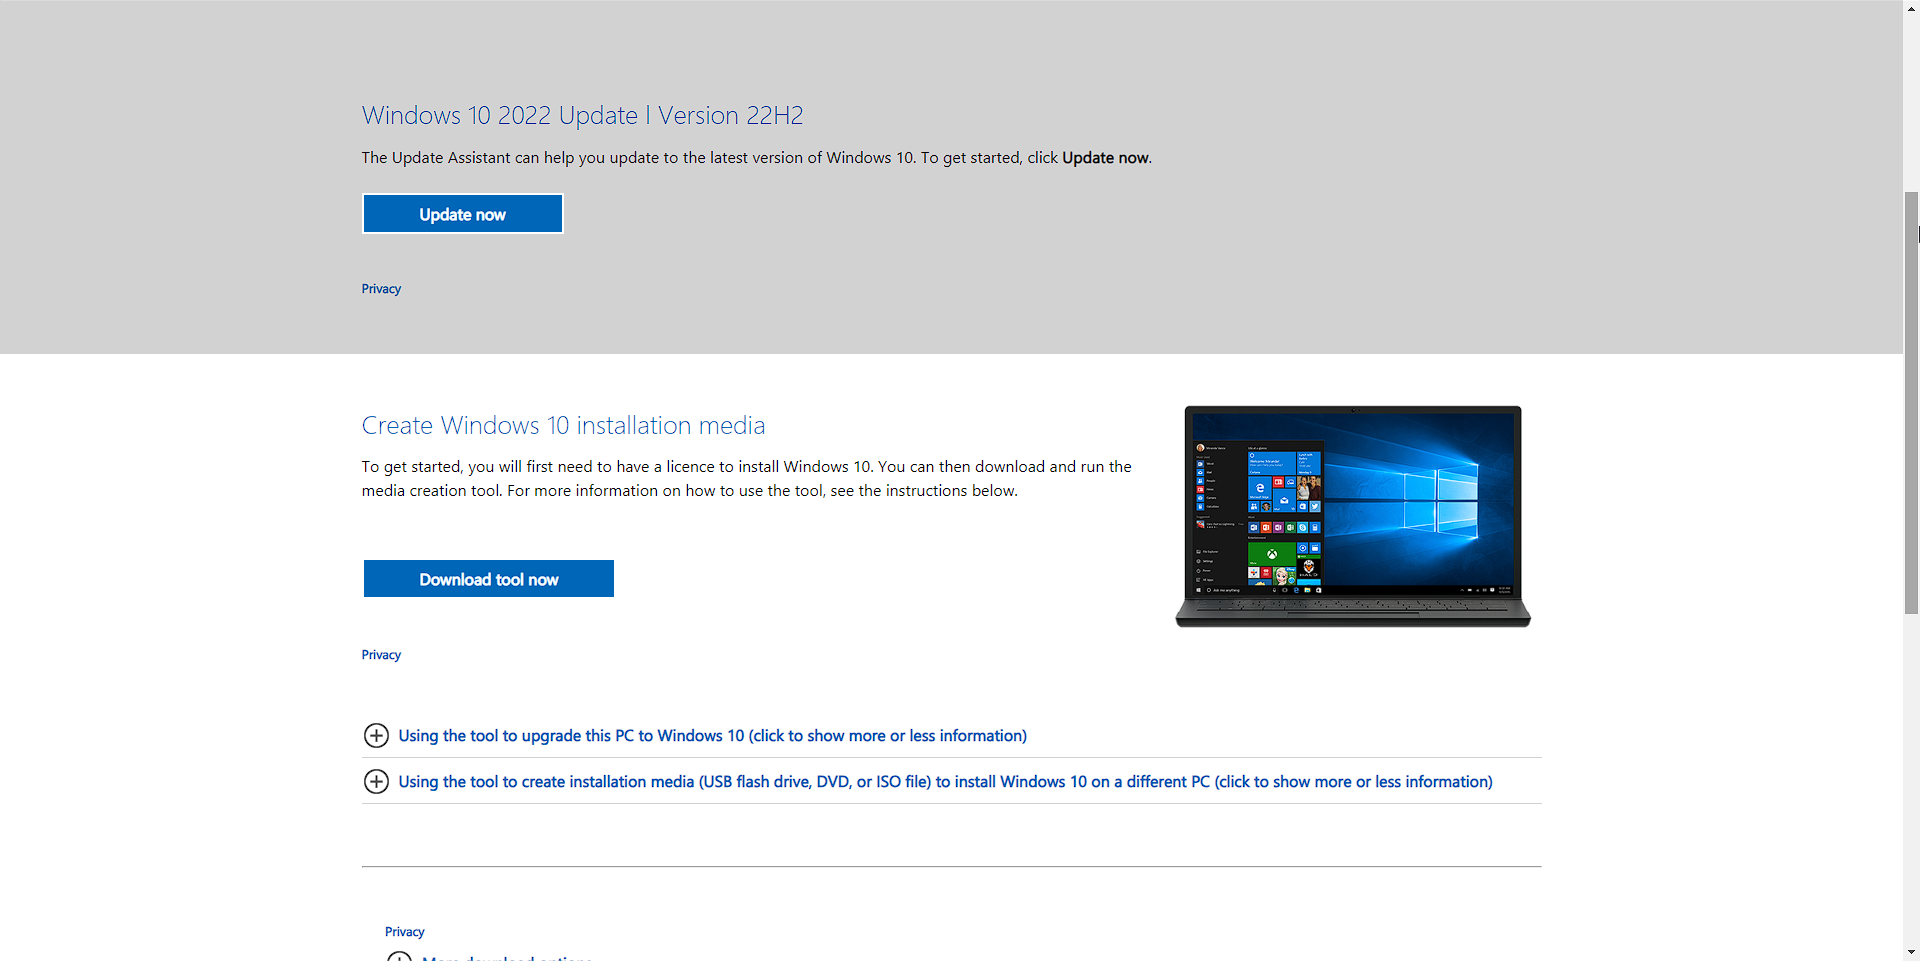
- Next, open the newly-downloaded file, and create the installation media.
- Restart your device as directed by Microsoft’s tool.

- Follow the on-screen instructions to scan and fix system files after selecting a repair tool.
How do I fix corrupted Windows files without losing data?
Users of the built-in Windows repair process have access to several tools (which we mentioned above). That being said, we also need to include Tweaking Repair to the list. This app can fix system files with ease.
Although both methods have benefits, Tweaking Repair may be the ideal choice for various factors.

One of the most critical aspects of the Tweaking Repair tool is its user-friendly UI. This element allows any user, no matter their proficiency, to successfully find, use, and edit any setting they need.
As it is a simple-to-use app, this gives it an advantage over the built-in tools we described above. The alternative can be overwhelming to use at times. Users intimidated by the idea of independently debugging their system may find this app helpful.

Another benefit of Tweaking Repair is the software’s step-by-step instructions process. Rather than leaving customers to figure things out independently, Tweaking Repair guides them through the process.
This helps reduce misunderstandings and errors, resulting in a faster and more effective repair procedure.
Other valuable features of Tweaking Repair:
- Repairs damaged system files (if any are identified during the scan) – Built-in Windows utilities can handle many situations. Tweaking Repair has a track record of successfully solving even the most challenging and stubborn problems.
- Simplifies restoring Windows 10 and Windows 11 system files via a USB stick – Tweaking Repair can be used as a portable PC-repair toolkit. Achieving this is simple: copy it on an external storage device and plug it into a PC that needs help.
The built-in Windows repair tools and Tweaking Repair can restore corrupted system files with a few clicks of the mouse. If you’re overwhelmed by using the Command Prompt to run commands, choosing the latter is the best option.
Tweaking provides step-by-step guidance through the entirety of the repair process. Even more, it also proves to be highly effective in fixing broken system files without erasing data.

Vladimir Popescu
Verified at:
07/03/2023 10:31
Vladimir started writing articles about Windows because he has a natural interest in this topic, and he has been an avid professional user with more than 15 years of experience. He’s also been writing for WindowsReport.com, MSPoweruser.com and present in various other online publications on matters related to Windows and Windows servers.
Vladimir enjoys practicing Crossfit and making art when he’s not creating top articles with in-depth information.


Leave a Reply