Are you looking to fix the WMI Invalid Class Error? Encountering this issue can be a frustrating experience, especially when it disrupts your system’s functionality. This guide simplifies the process, offering a straightforward approach to tackling this common issue.
We focus on providing clear, step-by-step instructions, ensuring that even those new to such technical challenges can resolve the error effectively. We’ll demystify the process, making it accessible and manageable for everyone.
Why am I seeing the WMI Invalid Class error?
The WMI Invalid Class error surfaces due to various underlying issues in the system, each with unique implications and solutions. Understanding these reasons is key to effective troubleshooting.
- Corrupted WMI repository – The WMI repository can become corrupted due to improper system shutdowns, software conflicts, or malfunctions., leading to an invalid class error.
- System updates or changes – System updates might modify or remove certain WMI classes that applications or scripts used, leading to errors. Similarly, system configuration changes or new software installations can alter how WMI classes are accessed or utilized.
- Compatibility issues – WMI classes are designed to be compatible with specific versions of the Windows operating system. If you’re running a script or application that references WMI classes not supported by your Windows version, you’ll encounter this error.
How do I fix WMI Invalid Class errors?
Addressing the WMI Invalid Class error involves several potential solutions, each suited to varying levels of user expertise and comfort with technical processes. Here are three practical approaches:
1. Use Tweaking Repair
Windows Repair from Tweaking.com is a comprehensive tool designed to fix various WMI-related issues, including the invalid class error. Follow these steps to use this tool:
- Head to the Tweaking home page and find the Windows Repair tool, then download the tool to your computer.
- Follow the installation instructions to set up the tool on your system.
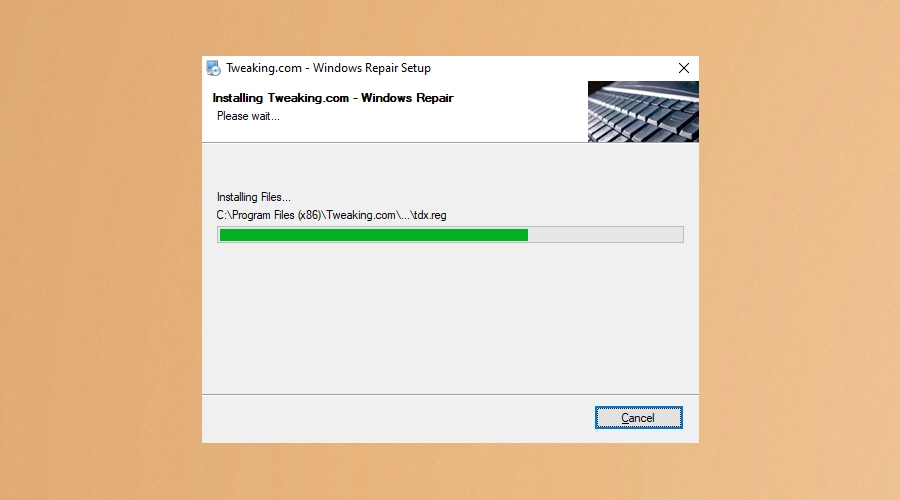
- Once installed, launch Tweaking Windows Repair tool. It’s recommended to close all other applications before proceeding.
- Initiate the pre-repair process. Follow the instructions and complete all four Pre-Repair Steps.
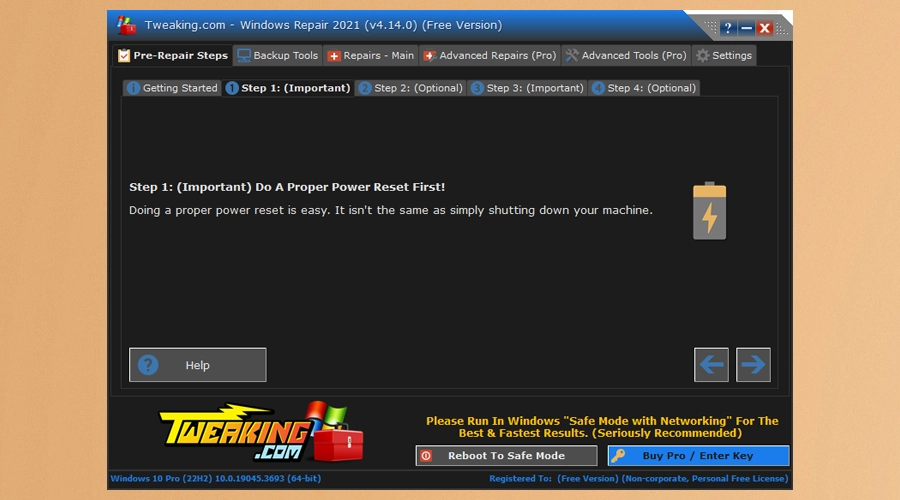
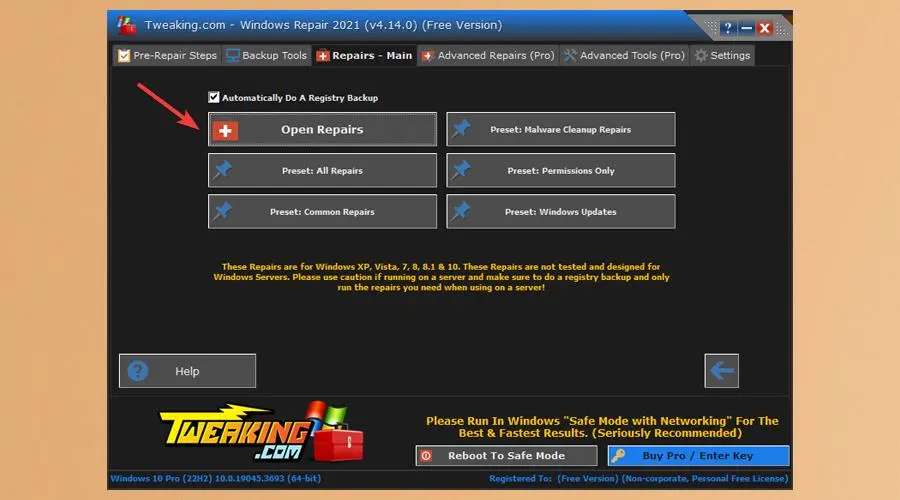
- Under Repairs – Main, select Open Repairs.
- Select Repair WMI and click Start Repairs.
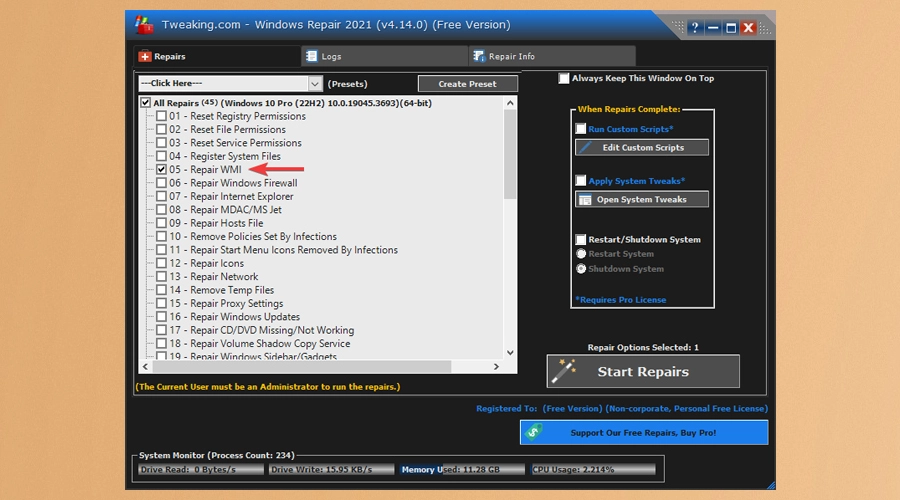
- The tool will automatically begin the process of diagnosing and repairing WMI issues. This process might take some time, depending on the system and the extent of the issues.
- After the repair process completes, restart your computer to ensure all changes take effect.
2. Rebuild the WMI repository manually
For those with a bit more technical expertise, manually rebuilding the WMI repository offers a hands-on approach to addressing the WMI Invalid Class error.
- Search for Command Prompt in the Start menu, right-click on it, and select Run as administrator.
- In the Command Prompt, type net stop winmgmt and press Enter.
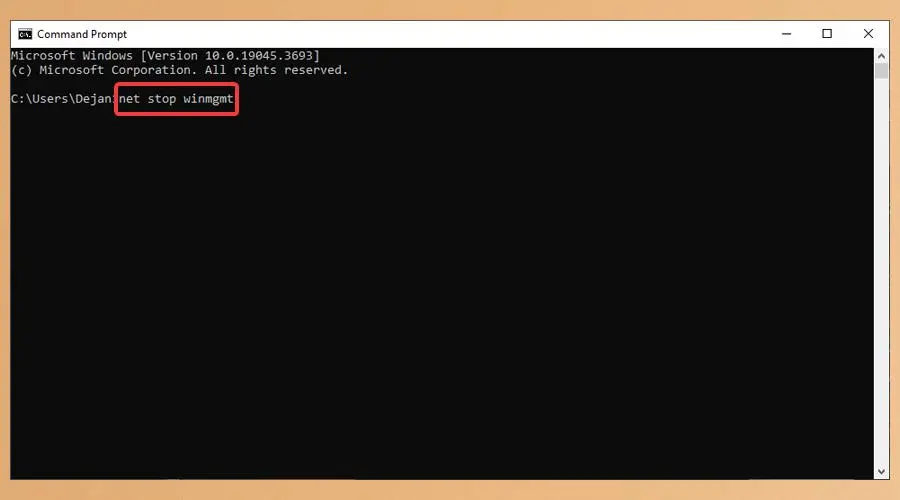
- This command stops the Windows Management Instrumentation service.
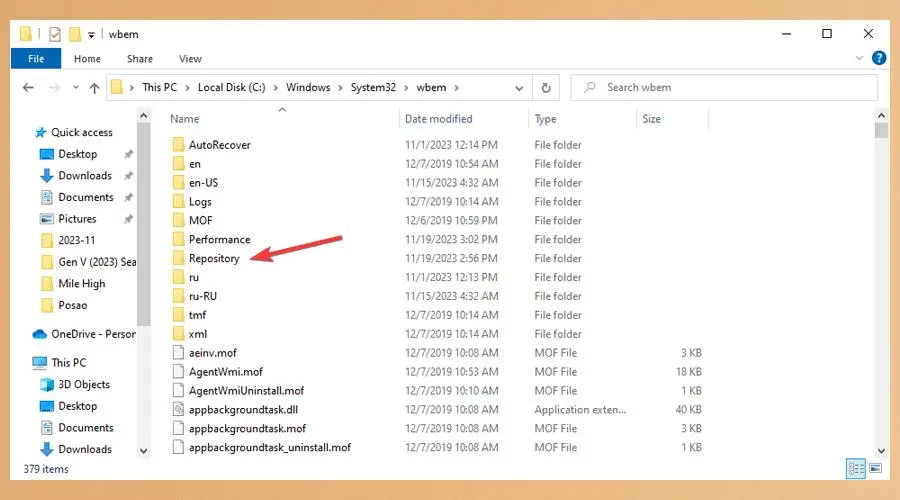
- Next, navigate to the C:\Windows\System32\wbem directory.
- Rename the Repository folder to something like Repository_old.
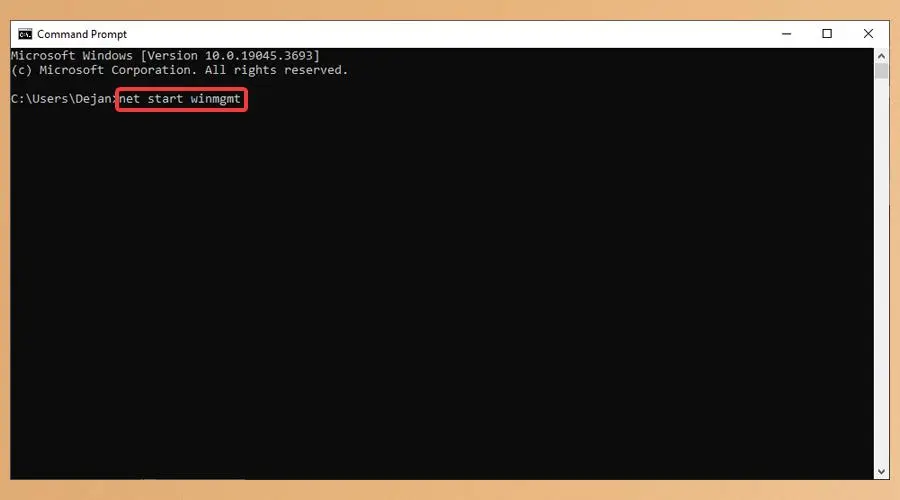
- Type net start winmgmt in the Command Prompt and press Enter.
- Finally, restart your computer for the changes to take full effect.
3. Run System File Checker
The System File Checker (SFC) is a built-in Windows tool that can repair corrupted system files, which may include those related to WMI.
- Search for Command Prompt in the Start menu and select Run as administrator.
- In the Command Prompt, type sfc /scannow and press Enter.
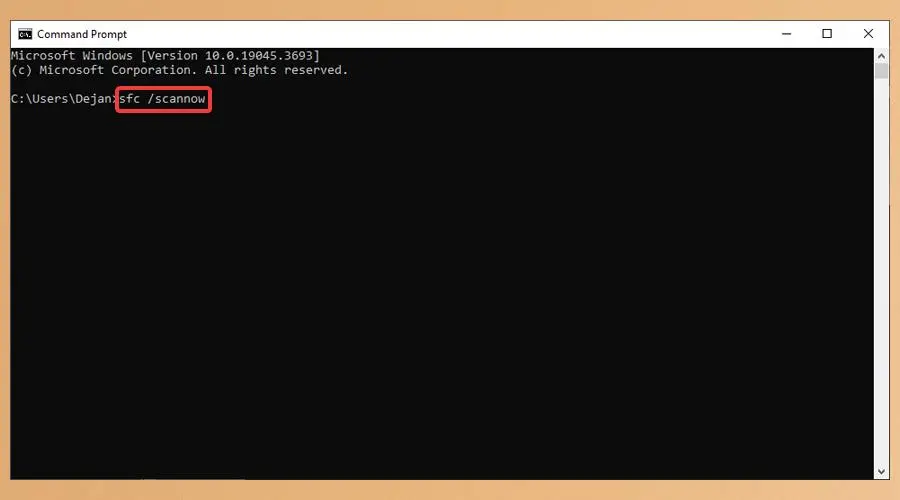
- The SFC tool will start scanning and repairing any corrupted system files it finds. This process can take some time, so patience is necessary.
- Once the scan and repair process is complete, restart your computer.
Conclusion
Applying the steps to fix WMI Invalid Class enhances your system’s functionality and reliability. This guide has been designed to offer straightforward solutions to this common issue.
Should you face any difficulties or have additional questions after following these instructions, please feel free to leave a comment.
[email protected]
Verified at:
06/11/2023 10:18
Leave a Reply